Liza

Mar 092011
 

I’m sorry I’ve been MIA for two weeks now.  For those of you who get my Facebook and Twitter updates,  you may have saw my quick note a few days ago with a brief explanation.  Now that I have a few minutes, I wanted to share with everyone here.

Because my BP had been up fairly high for the last couple weeks of my pregnancy, and because I was officially past my due date, I went into the hospital at the request of my Dr. on February 20th to be induced.  You hear the word “induced” and you think “yay, this should be quick!”.  Then you find out – hey, just kidding!  Induction is so slow.  At least in my case it was.  We started with pills to thin things out Sunday night, and the nurses were telling me to get as much sleep as I could that night, because I was going to need it.  Except that Baby C has been a squirmy gymnast since about month four, and that night was no exception.  The nurses had to keep waking me up to readjust the fetal monitor for my belly, because the baby kept moving away from it.

Monday morning we started the Pit drip, and again I thought “okay, here we go, this will really get things rolling”.  Again – not so much.  By mid-afternoon I was barely half-way there and things were slowing back down.  It was at that point that I decided to go ahead and get an epidural; I had planned on trying to go natural, but I was in quite a bit of pain, and the nurses said it was likely going to be hours still before anything happened.  In fact, every time they came in to check on me, they pushed back their “guesstimate” of when I could expect the show to start.

The epi made me more comfortable for a few hours, but then the machine administering the epidural started to beep beep beep beep beep (imagine that over and over and then imagine being annoyed.  Oh so annoyed.)  The beeping triggered the machine to shut off (ended up there was an air bubble in the line), and after awhile I started feeling some pain on one side.  While they were trying to get the machine fixed and do a few other things, they had me laying flat on my back.  Laying on my back had not been my friend at all while pregnant.  At my last ultrasound, which was taking awhile because they were checking on Baby C to make sure she wasn’t stressed from my BP being up, I started feeling really hot and nauseated and I almost passed out.  So I told the nurse that was checking my progress that I was starting to feel not so hot, and then I told the nurse that I was actually feeling worse than not so hot; about 15 seconds later I was sick to my stomach.  Not fun!

After they were able to get my epi fixed (and showing me how to use the button to give myself more, something my anesthesiologist had forgotten to do; how do you forget to show someone that part??) and gave me an extra dose to make up for it being off so long (my left side was really hurting at that point), things started moving along again.  One of the doctors from my practice (not my actual doctor as she had gone off her shift a few hours before. It made me really glad she had rotated my early appointments around so that I’d meet all the staff; a brand new face at that point might have made me a little nervous) came in and said “let’s do this!” and so we did.  Less than 40 minutes after starting, Baby C showed her sweet little face to the world for the first time.  Oh, she is adorable.  And yes, I’m a little partial!

Because it was just after midnight, they wanted us to stay for the full two days, so we weren’t able to leave until Thursday afternoon, which meant 5 days total in the hospital.  We were oh so ready to leave by then!  We wanted to sleep in our own bed and we wanted to get home and cuddle Baby C!  My hubby was awesome; he stayed at the hospital and slept there every night.  He did go home for a couple of hours one day to take a shower and email pictures to our family, but otherwise, never left.

So now we’re home and trying to settle into a routine.  We’re doing really well, other than being a little tired.  Or a lot tired, to be more accurate.  But she’s so precious that even living on three 15-minute bursts of sleep per night isn’t that big of a deal.  Though I’ll be happy when she sleeps for a few hours at a time.

I’m trying to get back into the swing of things here, too; between the baby and having to had to return work already, it’s been a little hard to find a groove.  I know I have some winners to draw, some reviews to write, giveaways to post and deals to share.  In the next day or so, I should be getting a good start on all of that.  Just bare with me for a couple of days as we adjust to our new schedules here at home.

Feb 142011
 

Valentine’s Day Recipes

I hope everyone – single, married, partnered, dating, and anything in between – has a great Valentine’s Day!  Do something sweet for the ones you love – not just your significant others, but kids, parents, grandparents, friends, whomever – and then do something sweet for yourself!
Celebrate Valentine's with these Valentine's Day recipes
If you’re looking for a tasty treat to whip up for someone today, there are lots of tasty bites you could make.  I am planning to make Spaghetti with homemade spaghetti sauce for dinner and  Molten Chocolate Lava Cakes for dessert.  A little Lady and the Tramp nod, I guess :)  Spaghetti is one of my husband’s most requested meals, and the Lava Cakes make for a little special extra (and are much easier than you’d think!).   The sauce will make your house smell awesome; I have it on the stove right now and I’m starting to drool a little!   Here are my Valentine’s Day recipes:
Homemade Spaghetti Sauce

1 (28oz) can crushed tomatoes
2 (6-8oz each) cans tomato paste
2 (6-8oz each) cans tomato sauce
1/2 C minced onion (if you’re not big on onion, you could use a little onion powder instead)
2 cloves garlic, crushed (if you don’t have fresh garlic, you can sub garlic powder)
1/2 C water
2 T sugar
1 tsp dried basil
1/2 tsp fennel seeds
1 T Italian seasoning
1 T kosher salt
1/4 tsp black pepper
1 tsp red pepper flakes
2 T fresh parsley, chopped (can substitute dried if you don’t have fresh)
mushrooms, cleaned (1/2-1 lb fresh or 8-12oz canned; adjust for your level of mushroom love)
1/2-1 lb ground beef (depending on how meaty you like your sauce)
  1. In a Dutch oven, saute onion, garlic, ground beef and mushroom over medium heat until no longer pink.  Stir in the crushed tomatoes, tomato sauce, tomato paste and water.
  2. Add in the sugar, basil, fennel seeds, Italian seasoning, salt, pepper, red pepper flakes and parsley.  Simmer and cover for at least 1 1/2 hours.
Note: if you’re in a rush, you can simmer until everything is heated through.  But the longer you let this sit, the better it is, because all the seasonings get a chance to meld.

Molten Chocolate Lava Cakes

4 sq. Baker’s semi-sweet chocolate
1/2 C butter
1 C powdered sugar, plus more for dusting
2 eggs + 2 egg yolks
6 T flour
whipped cream (optional)
  1. Preheat oven to 425.  Butter 4 (3/4 C) custard cups, ramekins or souffle dishes.  Place on a baking sheet.
  2. Microwave chocolate and butter in large bowl 1 minute, or until melted.  Stir with wire whisk until completed melted.  Stir in sugar.  Whisk in both eggs and both egg yolks.  Stir in the flour.  Divide batter between prepared dishes.
  3. Bake 13-14 minutes or until sides are firm but centers are soft.  Let stand 1 minute.  Run a small knife around cakes to loosen, and invert onto serving dishes (small dessert plates work well).  Dust with powdered sugar and top with a dollop of whipped cream, if desired.  Serve immediately.
I’ve had these recipes on cards for ever, so I apologize for not being able to link you to the sources.  But there are dozens of similar recipes out there (especially for the molten cakes), so feel free to search around for something that fits your tastes.  And with the sauce, always feel free to mix it up with whatever meats, add-in and seasonings that you love!
Jan 072011
 

I know that I have mentioned to you all a couple of times that I enjoy organization.  If I’m being very honest, though, I don’t just enjoy it.  I love it.  Really love it.  The clothes in my closet are organized by color, sleeve length, etc.  Our entertainment center has four cubbies in it with DVDs, console games, etc. that I have organized by type (DVD, game, etc), genre (Christmas, kids, action, comedy, etc) and then finally alphabetically.  I also love all tools related to organizing – bins, labels, hanging closet organizers, plastic bins, all of it.  Because of that, my close friends have long teased me that winning a shopping spree to Staples would far outweigh any other store (which isn’t entirely true – but if someone from Staples is reading this and wanted to test that theory, it definitely wouldn’t make me cry!).

So when I found out that Applied Labels LLC had selected me to review their personalized labels, I was thrilled.  A little sick, I know, but really – they’re labels.  Do you know all the things you can do with labels?  Well, with these particular labels, you can do almost anything!  To start with, they’re personalized with whatever text you want in your choice of fonts, plus an optional cute icon!  If you have kids, you could personalize them with each child’s name and a category, like “Suzie’s Toys” with a soccer ball and “Bob’s Toys” with a train to make it easier for them to put their own things away in their own areas.  Also, they’re dishwasher and food safe (lead, DEHP & BPA free), so they’re great for lunchboxes, snack containers, etc. that you send to school, daycare, a friend’s house – wherever.

Since we haven’t settled 100% on a name for the baby yet, I chose to have mine personalized with my name and chose a butterfly icon on them.  Once we do decide, however, I would like to get some with her name on them to put on her bottles, sippy cups and other items that she could potentially mix up with other kids at a play date or similar outing.  The bottle labels are neat, because for less than $4, they will also send you a sheet of dates so you can stick them on the label and know when they were filled or when to use by.

The very first thing that I used the set sent to me for was holiday baking and cooking.  I was able to stick them on the serving dishes that I used at our parties and dinners so that my dishes would be easily recognizable.  It reminded me of when I was little and we would go to potluck dinners and everyone used a little piece of medical tape to write their name on and stick to their serving dish.  These are so much more durable – and much cuter!

What else can you use the labels for?  Quite honestly, anything.  You can even use them to label clothes (perfect for camp, school, and keeping kids’ clothing separated by child); you just stick them to one of the included blank backers to keep them secure.

Any other organizers out there want to confess to their love of organizing and share some favorite products, tips or methods?  Please leave a comment – I would love to see your responses :)

I received one or more of the products mentioned above for free using Tomoson.com. Regardless, I only recommend products or services I use personally and believe will be good for my readers. I am disclosing this in accordance with the Federal Trade Commissions 16 CFR, Part 255 Guides Concerning the Use of Endorsements and Testimonials in Advertising.

Dec 142010
 

Christmas Recipes: Treats to Give or Keep

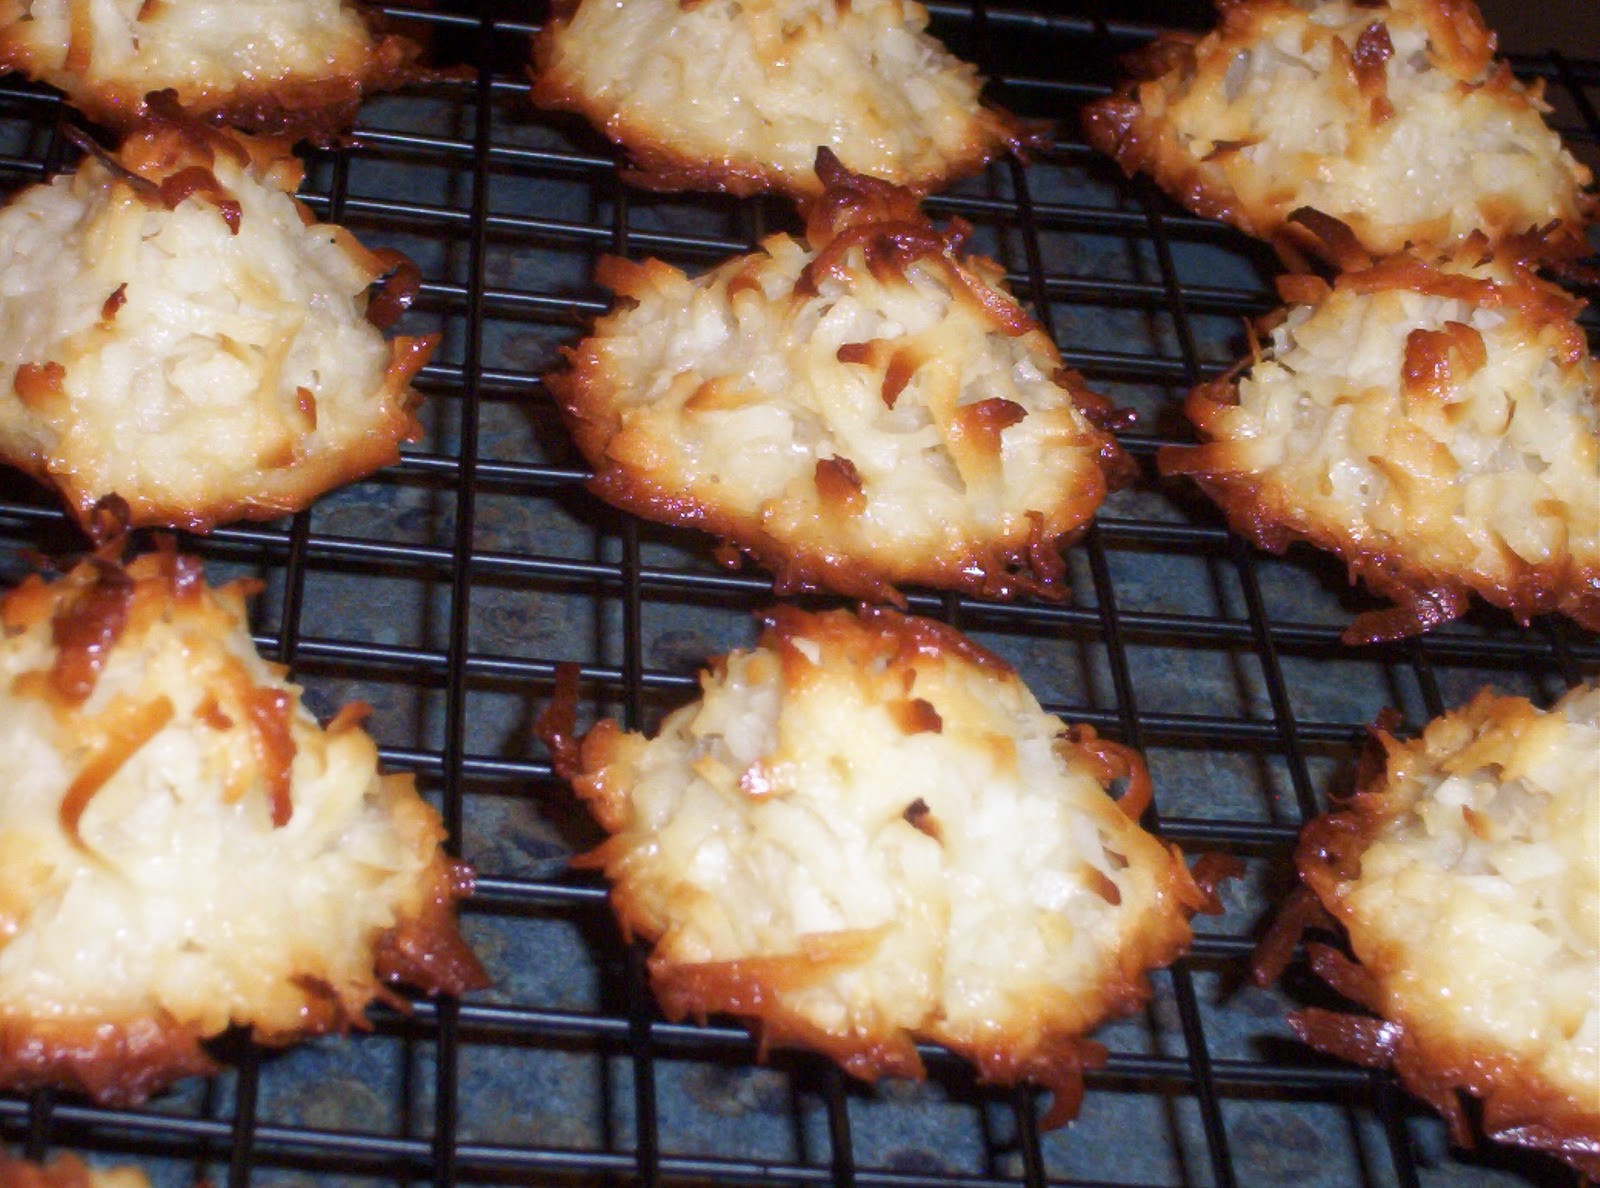
Christmas Recipes: Chocolate-Dipped Coconut Macaroons

My grandmother is a world-class baker and chef.  At least that’s what all her family and friends think!  She loves to cook and bake and loves to share it with others even more.  Every weekend when I was growing up, she would bake bread and then drive around delivering loaves and rolls to neighbors, family, friends and others.  At Christmastime, she always baked a huge variety of Christmas cookies, and then put together a “sampler” of each and took them around to everyone.  It’s a tradition I loved (and also looked forward to – her candy cane cookies are awesome!).

So last year I decided now that I live in Kentucky, to continue the tradition myself with our friends and family that live around here.  This past Friday and over the weekend, I did my baking, and then we made deliveries.  I chose to make Peanut Butter Buckeye Balls, Chocolate Pecan Fudge, Coconut Macaroons, Hello Dolly Bars (also called Magic Bars), and Chocolate Pudding Cookies with White Chocolate Chips and my grandmother’s Candy Cane Cookies.  Here are some of  the recipes that I used – you might decide to make a few yourself this year!

Chocolate Pecan Fudge

1 1/2 C sugar
2/3 C evaporated milk
2 T butter
1/4 tsp. salt
2 C mini marshmallows
1 1/2 C semi-sweet chocolate bits
1/2 C chopped pecans
1 tsp. vanilla extract

  1. Line 8″ square baking pan with foil.
  2. Combine sugar, evaporated milk, butter and salt in medium, heavy-duty saucepan. Bring to a full rolling boil over medium heat, stirring constantly. Boil, stirring constantly, for 4 to 5 minutes. Remove from heat.
  3. Stir in marshmallows, morsels, nuts and vanilla extract. Stir vigorously for 1 minute or until marshmallows are melted. Pour into prepared baking pan; refrigerate for 2 hours or until firm. Lift from pan; remove foil. Cut into pieces.

Continue reading »

Dec 112010
 

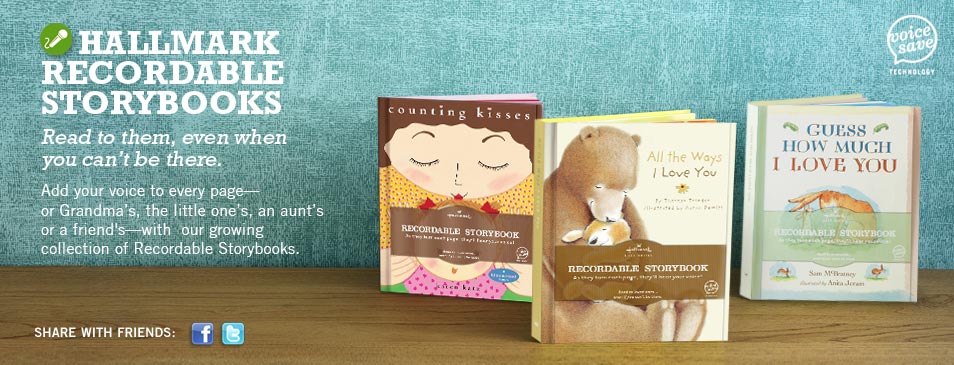
I remember very vividly – and fondly – my father reading to me as a child, and especially around Christmas.  Because we live over a 1,000 miles apart and we get to see each other so infrequently, I knew that those memories would be a little more challenging to create with the little one that’s due in February.

I remember my father reading ‘Twas the Night Before Christmas to my brothers and I each Christmas as kids.  So when I was asked to review the Hallmark Recordable Book of the same title I was happy to do so.  I knew that I wanted to send it to my Dad to capture him reading the beloved story so I could share it with his grandbaby.

Once it arrived I read through the instructions so that I would be able to assist my Dad if he had questions.  The instructions were both easy and clear however.  You literally just read the text on the page, flip, and repeat.  When you finish and it sounds the way you want it to, you just pop out the battery and slide the button to LOCK.  Now your work is saved!  And you don’t lose the story when you change the batteries.

I mailed the book to my Dad with a note as to what I wanted him to do and why.  He called me up to let me know he received it and how easy it had been to follow the instructions.  He also thought it was a great idea for a keepsake.  As soon as I received it back, I flipped through it to listen and read along.  It definitely brought me back to my childhood!  I can’t wait to share it with my new little one and give them the opportunity to hear their Grampie’s voice any time they want.

I’ve always loved Hallmark and their collectible keepsakes.  I’m really glad they have started offering this new product.  They have many titles available, including Frosty the Snowman, The Very First Christmas, Guess How Much I Love You and many more – 15 total!